So you’re going on vacation somewhere beautiful and tropical (or maybe somewhere cold and you’re just really brave!) and you want to be able to capture some stunning half underwater shots while you’re there?
I’ve been there! In fact, being able to take cool underwater and split shots was one of the biggest reasons I bought my own GoPro camera. There’s such a range of great GoPro underwater accessories at a fraction of what it would cost to use other professional cameras underwater, and the quality of GoPro is amazing!
So today I’ve got some tips for you on how to choose the best GoPro dome for your needs, a few reviews of some of the best GoPro domes currently on the market, and other tips and tricks you need to know before you get started taking amazing split photo shots! Let’s dive in and prepare to get some great GoPro dome photos underwater 😉
Contents
Best GoPro Domes Quick Comparison Guide
Want to see the best options at a glance? Here’s a quick comparison chart to help you see different domes compared side-by-side.
[table id=7 /]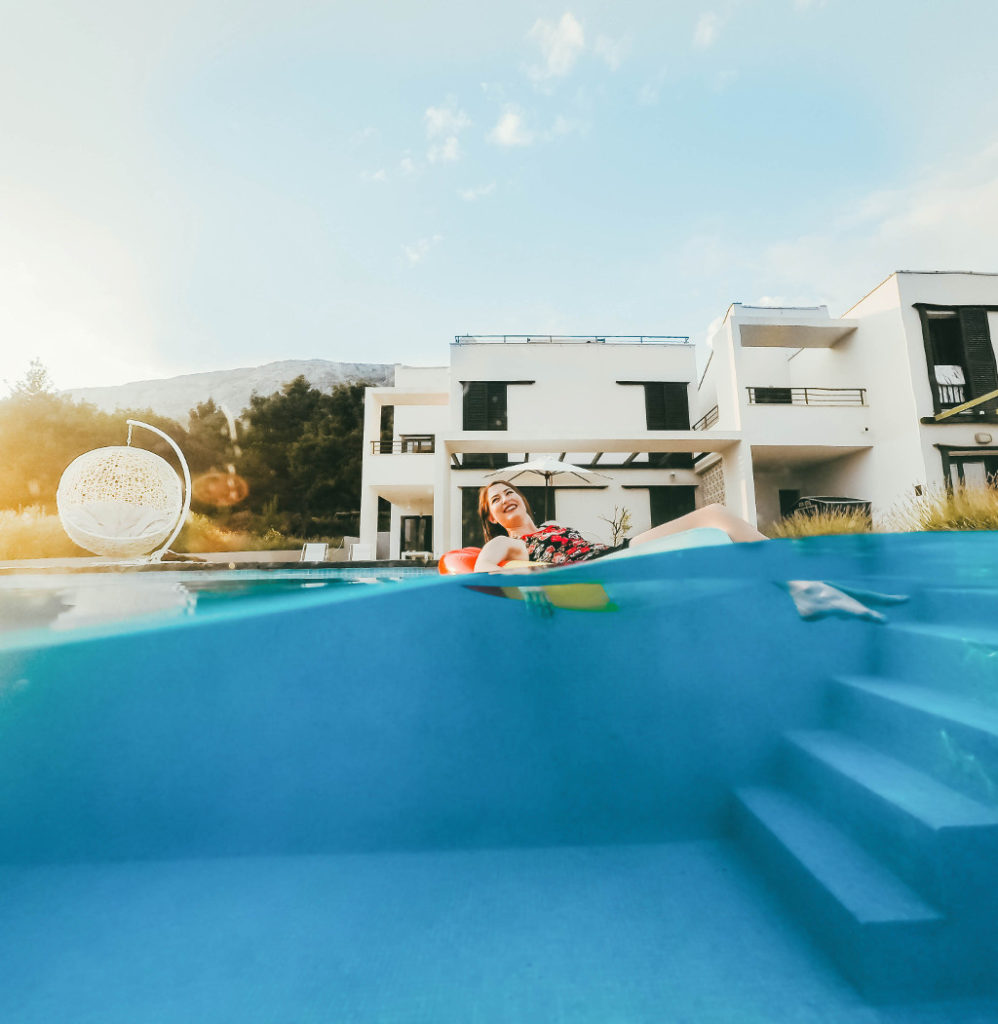
Why Use a GoPro Dome Port?
A GoPro dome port is a super cool invention that helps you capture split photos and videos to get that perfect over/underwater look. Dome ports work by using a bubble lens to push the water away from the camera so you can easily adjust your viewpoint and level in the water.
If you have ever envied those cool Instagrammers who get epic shots half above water and half below, then you definitely need a dome port. GoPro dome photography will open up your horizons to new and exciting photo and video possibilities!
How to Use a GoPro Dome for Split Photography
Using a dome for split shot underwater photography looks complicated, but can actually be easier than you think. But there are a few things you need to keep in mind to get the best shots.
1. Shoot in Burst Mode
Personally, I believe the most important factor in split level photography is to shoot in burst mode. Especially if you are somewhere (like an ocean) where the surface of the water is continuously moving.
If you only take one photo each time you press the shutter, you will likely miss some of the best shots as it can be really difficult to capture the subject(s) in a good position at the same time that the water is in a good position. Burst mode allows you to click once and capture many photos within a short time frame, which means you are more likely to get an epic shot!
2. Find Good Subjects Above and Below the Surface
GoPro underwater photos work best when there is something cool to see above and below the water. This isn’t a hard and fast rule, of course, but is a good general guideline to follow. Usually, you’ll want to have some action and excitement to give a purpose to why you’re taking a half underwater photo rather than just a normal photo!
3. Compose Your Shot
Like any photography, you’ll want to think about how you compose your shot. Do you want to take it vertically or horizontally? How much sky do you want in the photo and how much water do you want?
The “classic” underwater shot is 50/50 sky and water, but you may need to adjust this depending on what your subject below the water is doing and what is happening with your subject above.
4. Choose Your Settings
Depending on the dome you choose, it is likely that you will need to make sure to set your GoPro settings before you put it in the case. Think about whether you want a wide or narrow field of view and be sure to also set ISO and other settings so you can get the perfect shot.
What to Consider Before Buying a GoPro Dome Port
Although at first glance it may seem like all GoPro domes are alike, there are a few things that you should consider before choosing which dome port to buy. Let’s talk about some of the top features you need to think about when deciding what to purchase!
GoPro Camera Type

Before you choose a dome, you will need to make sure your GoPro is compatible. The HERO7 is the most recent GoPro model, and if you have the HERO7 black it is compatible with any of the dome ports that are compatible with the HERO5 or HERO6 as well.
However, if you have the HERO7 White or the HERO7 Silver you may have some issues finding a dome that will work. Several of the models explicitly state that their domes are not made for the white or silver models, while some offer using white/silver as a possibility while warning you that you will have to zoom the camera quite a bit to avoid lens interference. This dome is probably your best bet if you have the white or silver versions.
Note also that the GoPro HERO5 and above are waterproof out of the box, but if you have a HERO4 or earlier model then you should be aware that these cameras do NOT have waterproof capabilities on their own. This means that in buying a dome port for these earlier GoPro models you will want to be especially careful that the product you buy does not allow any leaking into the interior.
Lens Material and Durability
Practically all GoPro domes use some form of plastic for their lenses, including acrylic and ABS plastic.
Be aware that all dome lenses are prone to scratching, so if you buy a dome you must be prepared to treat it well and always, always, always cover it with a soft cover during any form or any length of transport. Many people are disappointed when their dome gets scratched, but then admit that they threw it in their bag without covering it before walking back from the beach to their hotel…so really, that’s their fault and not the fault of the product!
That being said, the durability and scratch resistance of each dome port lens will vary between different brands, so you will want to find one with the best possible track record of scratch resistance so that you can use it for many years to come.
Carrying Cover
Because the acrylic and plastic of the domes can scratch easily, it is essential to have and use a carrying cover during any transport scenarios. The majority of dome ports come with a carrying cover included, but if yours doesn’t (or if you’ve lost it) then you can buy a separate dome cover. This one is an option that should work for any 6 inch dome.
GoPro Dome Grips
The grips that come with the domes vary (and some domes don’t even include one in their kit!) In choosing a good grip, you will want to make sure that it says it will float in the water so you don’t lose your camera in the ocean if you let go of the grip for a second!
Another factor you may want to consider is whether the grip is an easily visible color like yellow, since this will make it easier to find and retrieve while in the water.
Additionally, if you plan to do underwater videography instead of just still photography, you may want to purchase a grip with a stabilizer tray instead of the standard one-hand grip. This will make your videos much more stable and seamless!
Ease of Cleaning
With an underwater product like this, it is inevitable that at some point the dome may fog up or get water drops or water spots inside the lens.
Some domes make it easy to clean the inside of the lens, while others are harder to clean and simply have a small hole that you have to try to clean the whole lens through. If the ease of cleaning matters to you, you will want to check this feature out to choose the best dome for your needs.
How to Care for Your GoPro Dome Port
Before you even put your GoPro in your new dome, there’s a few things you need to do. Some of these are one-time only while others are for caring for your dome whenever you use it.
1. Test Your Dome for Leaks
Taking your GoPro hero underwater can be a little nerve-wracking at first, so before you place your GoPro in your new dome you’ll want to check the dome out to see if it leaks. Although many dome brands test to make sure their designs work well, you will want to verify that your specific product doesn’t have a fluke in the design. This is especially important if you have an earlier GoPro model that is not waterproof.
A good test would be to keep your dome underwater for 5 minutes and then check to see if there are droplets or fogging inside. If there is, then this may indicate your dome has an issue. You can check with the manufacturer for more information and further steps to take. The good news is that you won’t need to test your dome every time you want to use it, but it is good to check it out before your first use.
2. Prep with Water Repellent
When you’re taking split shots, it’s probable that there will be some water droplets on the half of the dome lens above the water. These droplets can easily ruin a good photo, so you want to try to minimize them as much as possible.
One solution is to never let the top half of the dome lens touch the water, but if you yourself are immersed in the water this is unlikely to be a helpful or possible solution.
Another solution is to prep your dome lens with a water repellent like Clarifii or Rain-X to help prevent droplet formation. Be sure you choose a solution that is safe for plastic! Although water repellents won’t work 100%, they do help somewhat in keeping drops out of your pictures so it is definitely worth buying.
As a last resort, I have also heard that licking the dome might help. But that sounds icky…especially when shooting in salt water…so I have yet to be desperate enough to try this last solution myself. 😂
3. Use Anti-Fog Inserts
If you are shooting somewhere humid or warm, it is particularly likely that your dome will fog up while you try to use it. This ruins your pictures, as they become blurry and foggy in the end result.
To help prevent this, you can attach anti-fog inserts to the back of your GoPro dome. They will not be visible in your photos, but will work to absorb the humidity that causes the fog while you are shooting.
Some domes come with anti-fog inserts to start you off but if yours doesn’t or if you need replacements then you can find a range of cheap anti-fog inserts here.
4. Rinse After Use
Every time you use your dome in salt water, you will want to at least rinse it in fresh water before putting it away. The salt water will cause issues with the acrylic materials and may cause your dome to become permanently harmed if you neglect to rinse it. You may also wish to purchase a cleaning agent to use once in a while, but if you do you need to be sure that the cleaning agent is safe for acrylic.

Best GoPro Dome Port Reviews 2019
Below are some of the best and most beloved GoPro dome ports available on the market. Each has some pros and cons, so you will want to check to see which one aligns best with your shooting needs.
1. PolarPro FiftyFifty Dome

The PolarPro FiftyFifty Dome works with the HERO5, HERO6, and HERO7 GoPro cameras (excluding the HERO7 White and Silver editions according to PolarPro). It provides clear optics that allow you to take great shots above and below water.
Included with the FiftyFifty dome is a floating grip that will keep your GoPro on the surface of the water as well as a lanyard, cleaning tool, and neoprene cover to prevent scratches on the dome’s lens.
Some pros of this dome are the floating grip and the easy snap-in design allowing you to quickly install and remove your GoPro camera. The lens also provides very clear shots, and discount replacement lenses are available by contacting PolarPro customer support (in case you accidentally scratch or otherwise harm yours like I did at one point!) This is the dome I currently use, because the ease of installation and ease of changing modes on the GoPro while shooting weighs out over any cons.
There are a few cons, though, including that there is sometimes some vignetting on the corners when using your GoPro in wide mode (but this is easy to correct with cloning or cropping in an editing software like Lightroom). Additionally, the small lens hole makes the inside of the dome difficult to clean and the rubber plug meant to keep dust out of the dome is easy to lose. (Very easy to lose. Who knows where mine is?! Certainly not me. But there’s a good chance I left it somewhere in Kenya. 🤦♀️)
Click here to check the price and read more reviews.
2. GoPole Dome

The GoPole dome is compatible with the HERO5, HERO6, and HERO7 cameras and is a 6″ optically correct shape to provide the best over/underwater shots. Note that if you have the HERO7 white or silver models, GoPole states that you can use this dome but that you will have to zoom the camera quite a bit to avoid lens interference.
This product comes with a dome, waterproof housing to protect your GoPro, a thumbscrew, and a soft travel bag to protect the dome lens.
Pros of the GoPole dome is that it is easy to pop your camera into the dome and into the waterproof housing. But one of the biggest cons is that there is no mount included, so if you choose to buy this product you will need to purchase a mount separately.
Thankfully, the GoPole dome is compatible with all standard GoPro and GoPole mounts, so it is easy to find one that will work. This floating hand grip is a good option as it will stay on top of the water and is easily visible due to its yellow coloring.
Click here to check the price of the GoPole dome and read more reviews.
3. Telesin 6″ Dome Port

The Telesin 6″ Dome Port is designed to use with the GoPro HERO5, HERO6, and HERO7 for split above/below water shooting (note that this product does not work with the HERO7 white or silver options). It is made with PC and acrylic which is highly transparent to allow you to capture clear images.
This Telesin GoPro dome is 6 inches and weighs 250 grams, and comes with a rubber handheld grip that floats in the water so you won’t lose your grip or camera by accidentally letting it sink. The bright yellow color on the grip also allows it to stand out in the water so you can easily spot it. Note that a soft protective bag made of neoprene and nylon is also included with this dome to help protect it from scratches and dust when you are not using it.
Pros of this product include that it is compact and lightweight, has a trigger function on the grip for shutter release (which you can choose to use or not use), and has a high visibility floating grip. It comes with standard GoPro connectors that allow you to attach longer poles if you wish to have a greater reach. Overall, it is easy to use and does what it advertises and many bloggers and content creators love it especially because of the trigger function.
Some cons of this Telesin dome port, however, include that it may need some tweaking out of the box to tighten screws so water does not leak in. Occasionally a little water still leaks in even after tightening, which can cause some blurriness in photos. A few GoPro users have also mentioned having trouble with the button controls poking small holes into the rubber coating of their GoPros, which in some instances even ruined the waterproofing of their cameras.
Click here to check the price and read more reviews.
4. Shoot Underwater Dome Port

The underwater dome port by Shoot comes in a version for the GoPro HERO5, HERO6, and HERO7, but also comes in a version for the HERO3+ and HERO4. It is waterproof up to 30 meters (they test each dome with a hydrostatic water pressure test) and it helps you to get that perfect half over, half underwater shot.
This dome comes with everything you need to get started with split photography, including the dome made from acrylic material and ABS plastic, a waterproof housing, and a non-slip EVA floating grip. Additionally, the dome’s base even has screws that allow you to fully disassemble the dome to clean the lens! All you need is a size 8 Allen wrench to remove the screws.
Other pros include that this dome comes with a travel bag for scratch protection and a microfiber cleaning cloth as well as 12 anti-fog inserts to keep your dome lens from fogging up.
Some cons, however, are that the door for the housing can be difficult to open, and it may occasionally take on a little water in the handle. There is also an area to attach a wrist strap, but no wrist strap is included in the bundle.
Click here to check the price and read more reviews.
5. Shoot Dome Port with Stabilizer Tray

This 6 inch Shoot dome port with stabilizer tray is designed for the GoPro HERO5, HERO6, and HERO7. Like the above dome port by Shoot, this dome port is waterproof up to 30 meters and includes a waterproof housing.
While a one-hand GoPro mount is great for still underwater photography, this dome port comes with a two-hand stabilizer tray…which makes it perfect for capturing underwater videos! The two-hand approach means that your hands will stay off of the camera which will keep your footage more stable. It is also nice that you can separate the tray and dome port to customize your accessories, and use the tray with a diving light or only a waterproof housing case if you wish.
Another pro of this dome port is its lens hood design to reduce lens flare and provide some measure of protection for the lens. While the lens is still acrylic and shock resistant ABS plastic—so it will still scratch in some cases—the lens hood does provide a little more protection in many situations.
This dome also comes with a 24cm x 24cm carrying bag that will hold and protect the dome port plus a few other small items, and a screwdriver is included for easy tightening of the mount.
One small possible con is that the included waterproof housing is not permanently fixed in place in the dome. This means there is a small possibility of water getting into the dome, but this product is very watertight so this is unlikely. The detachable waterproof housing also means that you can customize the way you use the parts provided in this kit, so it may actually be a pro instead of a con for many users.
Click here to check the price and read more reviews.
6. AmazonBasics Underwater Dome Port

The AmazonBasics underwater dome port works for the HERO5, HERO6, and HERO7 cameras and there is a second option available for those who have the HERO3+ or HERO4 versions. This dome port is about 7.2 by 4 inches and is ideal for situations like snorkeling (but is not recommended for deep diving).
The dome lens is made of acrylic and the waterproof casing locks the camera in place. There is a floating handle included with visible yellow markings for easy retrieval…and the kit also includes a wrist strap, carbiner, cleaning cloth, and wrench. There are two external buttons on the camera that allow you to start and stop shooting as well as change camera setting without having to remove the GoPro from the case.
One other pro is that this product is backed by a limited one-year warranty, so if you have issues you can get it fixed or replaced.
However, some GoPro users report that their domes came with scratches on the lens which is disappointing and may be an issue with the acrylic material used. Of course, in situations like these the dome should definitely be replaced by Amazon, but if you are worried about scratching you may wish to go with a different option.
Click here to check the price and read more reviews.
Best GoPro Dome for Still Shots
If you’re looking for a great GoPro over under dome for still shots, the PolarPro dome is an excellent choice. This is the one I use regularly and its low cost makes it a good option for those just interested in giving split level photography a try, while its quality also makes it a good option for those who are more serious about their GoPro photography.
Best GoPro Dome for Underwater Filming
If you’re looking for a more intensive option if you will be doing lots of video underwater or split level, then the Shoot Dome Port with Stabilizer Tray is likely the best GoPro dome case for you. This highly-rated dome’s two-hand stabilization makes it easier to get excellent video footage. Of course, you can still use it for still shots as well.
Do you have a GoPro and dome port? Which is your favorite? Share below!
Hey! I am looking for a dome for my GoPro white – do you have any new recommendations? Looks like the one you linked is out of stock
Hi Danielle! I think if I were you, I’d give the Telesin dome a try. The exterior size of the white, silver, and black GoPros are all the same…but the big difference is that the lens on the black has a slightly thicker protective covering around the lens which makes that section overall slightly thicker on the black than on the white or silver. This becomes an issue for white/silver users when the dome relies on the lens area to create suction and fill up all the space connecting the dome to the camera in order to keep water out (as in the PolarPro dome that I usually use). Although I haven’t personally used the Telesin dome with a GoPro White before, it is listed as working with the white and silver versions and from looking at the way the camera connects to the dome I believe it should work well for you. I hope this helps!
Do you have any recommendations for Protune settings (GoPro Hero 7 Black) for 50/50 and shallow diving? I’ll be videoing Humpback Whales in relatively clear ocean water.
Thanks so much!
Wow! That sounds like an epic experience, Kevin! Your GoPro settings will depend on several factors, including the lighting on the day, whether you plan to use a filter, and if you have a good editing software for post-processing…so you will likely need to play around a little on the day of shooting to get the settings right. That being said, I do have a recommendation for some Protune settings you could try to start:
Shutter: Auto
EV Comp: -0.5
ISO Min: 100
ISO Max: 400 for shallow diving, or maybe 800 if you decide to dive deeper
WB: Auto seems to work quite well underwater on the GoPro 7…or you could try Native if you want the most flexibility for editing
Sharp: Medium
Color: Flat if you plan to use editing software, GoPro if you don’t plan to edit
I’d also recommend shooting in 2.7k/60fps with image stabilization…or the ultimate setting (if your computer can handle editing it) would be to shoot with 4k/60fps and HyperSmooth since you have that ability on the GoPro 7. If you don’t plan to edit the footage, you could easily just stay with 1080/60fps.
One other thing…for your 50/50 shots, you may want to consider locking the Exposure Control to the bottom portion of the frame so that your subject below the water is always properly exposed. This may or may not help in your case (depending on lighting conditions) but it’s something to consider in case the lighting is hard to work with. I hope this helps and that you capture some amazing footage!